How To Check Your IP Address On Windows 10
Every gadget that serves as a means to connect to the internet has an IP address, such as, Modems, and phones and Laptops to mention a few. This tutorial is specially dedicated to those who are finding it hard to find their IP address on their windows 10 laptop. This tutorial promises to be brief and straight to the point. What we shall cover here will give you the necessary knowledge to understand how to check your IP address on windows 10.
However, before we go into the details of how to find your IP address, I will like to emphasis that there are two types of IP address on your windows 10 computer. The first one is the actual IP address which is the computers IP and the second one is the one that is provided by the internet service provider that you use in browsing the internet. Below are the necessary steps.
Steps to check your IP address on windows 10
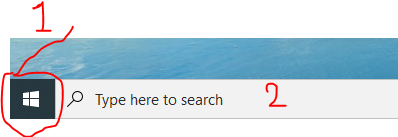
- Click on the windows start menu on your computer and then on the search bar below, type in command prompt to display the command prompt interface.
- After typing command prompt on your laptop, right click on your laptop and select run as administrator.
- When the command prompt interface opens, type this command "ipconfig" and press the enter key on your keyboard to display the IP of your computer. The display will be some codes and scripts. But you shouldn't worry about it because all you need to look for is where it says IPV4 ADDRESS.


Comments
Post a Comment